Table 2. Chemical Compositions of Steels used

丂
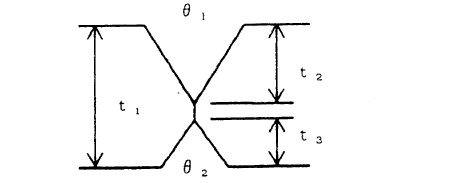
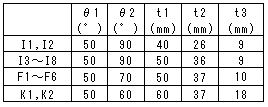
Welding method for all test specimens is the Submerged Arc Welding m flat position with X edge preparation as same as actual butt welding condition. Shape of joint is shown in Fig.3. Welding condition is shown in Table 3, and PWHT condition for test specimens carried out is shown m Table 4.
丂


Fig. 3 Shape of joint
丂
Table 3. Welding Condition for normal heat input

丂
Table 4. Condition of PWHT

丂
(3) Test Procedure
After welding of specimens, tensile test used enough cooled specimens was carried out by suitable testing machine.
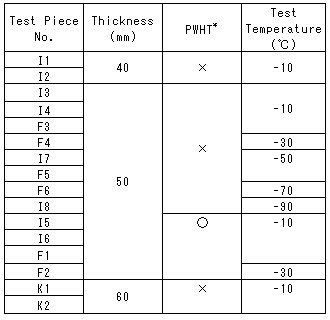
The tensile test was carried out for plate thickness of 40mm, 50mm, and 60mm to confirm effect on different thickness. With regard to thickness 10mm the test was carried out at different temperature -10, -30, -50, -70, -90 using specimen shown in with PWHT carried out and not. Test condition is Table 5.
丂
Table 5. Test Condition

*: With PWHT : 仜, Without PWHT: 亊
丂
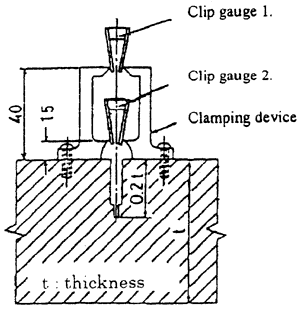
Two sets of clip gauges were fitted on center of notch shown in Fig. 4, in order to confirm the relation between load and opening displacement.
丂

Fig. 4 Fitting of Clip gauge
丂
丂
丂
BACK丂丂丂CONTENTS丂丂丂NEXT
丂